Learn how to Photograph Stars in the Night Sky with your SLR Camera
In this article, I’m going to break down the key techniques to taking amazing star photos so that anyone can have a go. You do need a decent SLR camera and lens to get the type of result shown in the shots on this page. You need to shoot in RAW, and you need to spend a bit of time in post processing to put some gloss on the result.
You also need a bit of luck. The air quality has to be right, you need a very dark sky, and of course, it helps to have a stunning location with a clear view of the sky.
You need a dark sky to photograph faint stars
When scientists build astronomical telescopes, they do so in remote places, often at high altitudes. They’re trying to get away from sources of light pollution, particularly from cities and large suburban areas.
The glow from light pollution outshines fainter stars and prevents the night sky from being true black. The glow results from moisture, smoke and dust particles in the air being illuminated and so air quality has a big effect on star photography as well.
Great star photography requires strong contrast between a black sky and a bright star. Higher altitudes tend to have clearer air, as do inland areas that are away from large sources of water.
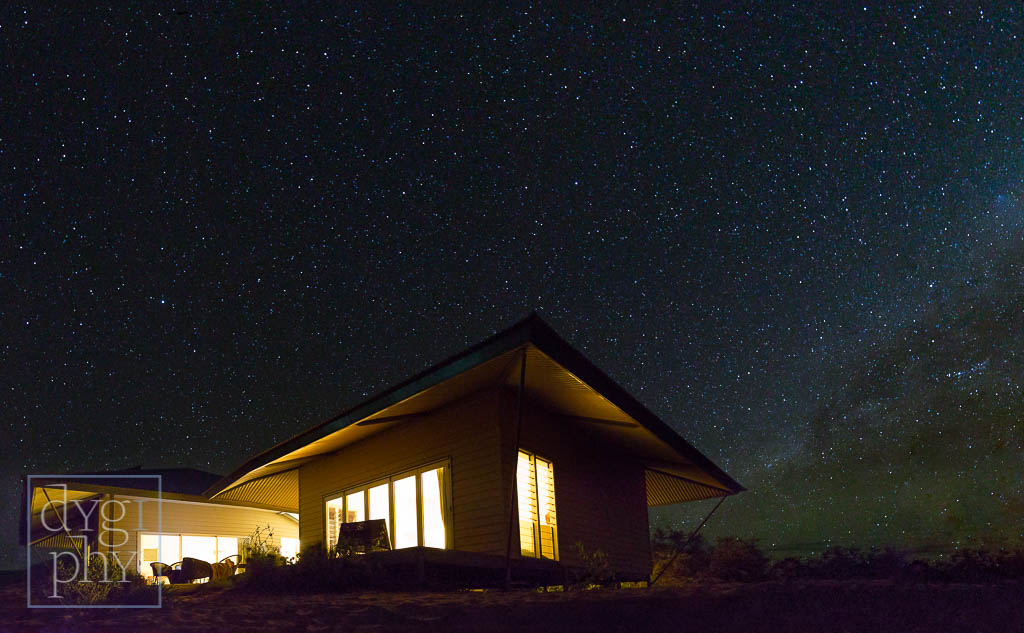
Photographing stars near the sea requires a bit of luck as the air is generally moister. When your luck is in though, the sea can be a spectacular location as the unobstructed horizon makes for a very big sky.

Focus is critical
Your stars won’t be bright if they are out of focus. The same is true if you have a poor quality lens that can’t resolve fine detail, or if the lens is dirty.
Contrary to logic, using the infinity focus mark on your lens usually doesn’t work. It’s a good place to start, but you’ll need to manually adjust by a fraction to achieve sharp focus from there.
You’re viewfinder is unlikely to have enough magnification for you to see critical sharpness, so I’d recommend enabling live view and zooming all the way in on the brightest star you can find, and then manually focusing as best you can. Autofocus normally won’t work.
The margin for error when focusing on stars is pretty small. To achieve a really outstanding result, it’s best to spend a bit of time getting this right.
If a sharp foreground is important to your shot, then you’ll need to compromise. Stopping down your lens is going to let in less light, and there isn’t much to begin with. In some cases you may be able to focus on the foreground, and then play with the hyperfocal point to ensure the stars stay sharp. Another option is to take 2 frames with different focus points, and then combine them in post.

It’s best when there’s no moon
The moon is incredibly bright. To get a correct exposure I normally photograph it at 1/1000 f/5.6 ISO 400. At those settings you are not going to see many stars, so if stars are what you are after you need to photograph when the moon is out of frame.
If you do include the moon in frame, you’ll likely have to overexpose it significantly before any foreground or sky detail is visible. At these brightness levels, the moon will create lens flare, which can look good but will reduce the visibility of faint stars considerably.
You are going to get the best results when the moon has set. I have a couple of apps on my phone that give me this information for a given GPS coordinate, and it’s handy information to have.
In some cases it can be helpful to have the moon in the sky behind the camera illuminating the foreground, especially if it’s off to one side and giving some form to the landscape. A partial moon is better.
In general, whether in frame or not, the moon acts as a source of light pollution and is going to reduce the number of visible stars. There are several shots on this page that include the moon in the frame. You’ll see for yourself how fewer stars are visible.

Set your shutter speed at 30 seconds
There is a trade off between shutter speed and star motion blur. I’ll talk more about star trails later, but because the earth spins around an axis, the stars appear to move around a centre point in the sky. The further from that centre point they are, the faster the stars are moving.
Any shutter speed will get stars sharp close to the south celestial pole (in the southern hemisphere, in the north it’s near the Polar star). With a 30 second exposure, stars further from this point will show a little motion blur, but not too much at most enlargement sizes.
Shutter speed is not the key to revealing faint stars unless you are using some kind of motion tracking mount that can spin your camera in perfect unison with the earth’s axis. Long exposure photography requires that each pixel in the frame stays in the same spot and eventually emits enough photons to become visible.
Beyond 30 seconds you will likely see a sharp rise in hot pixels in your photo. This is one reason why few cameras support a slower shut speed without resorting to bulb. They can be removed in post, but due to their similarity to stars, it tends to be a manual process.

A fast lens lets in more light
A photograph of stars can reveal a lot more stars than can be seen with the naked eye. In the case of the milky way, they are so dense they form the appearance of colourful clouds and individual stars are not discernible.
Photographing a star is about collecting as many photons as possible before the star moves too much. The single biggest factor that affects this is the brightness of your lens.
I use fast primes for star photography. My two favourites are the Sigma 35mm f/1.4 Art Series, and the Canon 85mm f/1.2L. Both lenses are sharp enough wide open to resolve stars. All the shots on this page are from one of these lenses.
There is not much point using a fast lens if you stop it down. As discussed in the focusing section above, you are better to combine two frames with different focus points than to compromise the light gathering ability of your fast prime lens by stopping it down.

Play around with ISO
Once those photos hit your camera sensor, you are going to want them to register. The ISO setting on your camera is really just a signal to noise ratio setting. Each pixel in your camera is susceptible to noise from heat and electrical interference, as well as photons, and your camera needs to decide which is which.
When you set your ISO setting higher, you will detect more stars, but also introduce noise to the photo. In some cases, it can be hard to tell the noise from the stars.
Each camera is different, and you will need to experiment. With my Canon 5D III, I’ll happily go to ISO 3200 and be confident I can separate the noise from the stars using Lightroom’s excellent noise reduction algorithms.
Shoot the foreground before dark
A few shots on this page are a composite of multiple images, some of which were taken in lighter conditions. If you are willing to setup your camera around sunset and stick around for a few hours, you can snap a focused, stopped down shot of the foreground in better light, and then combine it with the sky later.
One good reason for doing this is angular light. Once the sun goes down light will be coming from the whole sky and create flat, directionless conditions. That wonderfully textured foreground you saw during the day won’t seem so interesting when photographed after dark. At around sunset, there is still direction in the light, and you will achieve a better result.
Even being careful with a tripod you will get a bit of movement between the frames, but Photoshop will easily be able to align the two later.

Use light painting
I carry a good quality, lens focused, LED torch when I go on field trips. The one I use is the LED Lenser 7.2 tactical. This amazing little pocket sized device can put a bright enough spot on the landscape 100m away that my camera can achieve autofocus after dark.
Its other use is for light painting, a technique in which you flash your torch (or Speedlight) strategically around the scene while the shutter is open to burn in details.
I adjust the beam width on my LED Lenser as required and pick out details in the landscape on which I want greater illumination. It helps to get away to the side of the camera to get some angle in the light, otherwise the results will be very flat.
You’ll need to have a think about white balance when using a torch. The LED Lenser is daylight balanced, which isn’t bad for star shots. I have also used it in combination with tungsten Speedlight gels when I need to warm it up a bit.

How to make light trails
As discussed earlier, light trails form as a result of motion blurring stars as the earth rotates around its axis. This can either be a problem or a feature, depending on what creative result you are after.
Light trails require very long exposures to give the stars enough time to move a material distance. The duration is a creative decision, but will be measured in hours. The star trail photo on this page was taken over 6 hours. Obviously, to get a full 360° rotation it will take 24 hours, which for most places on earth would be ruined by sunrise.
Due to the hot pixel issues with digital cameras, film cameras are better suited to star trail photography. Digital cameras can be used, but you will need to use a photo stacking technique in which a large number of short duration exposures are combined to form the trail.
One advantage this digital technique has over film cameras is how bright the sky gets. During very long exposures the sky continues to brighten as a result of any light pollution. Stacking hundreds of 30 second exposures avoids this problem.

Processing tips
White balance
Stars are very colourful. For best effect, you will need to manually set your white balance, as your camera will in most cases not be able to work it out automatically. The dark sky itself may also have colour depending on how close you are to sunset or sunrise, and you may find you need to find a white balance that compliments both.
For a black sky, I start with a temperature/tint around 4300/20. I then play around until I get the right aesthetic result. Increasing saturation can help to create a more engaging (if less accurate) star photograph.

Noise reduction
In general you will be working with higher ISO settings and so a little noise reduction will help. Modern SLRs, particularly full format, are pretty good these days, and if you don’t mind a bit of grain, you could disable noise reduction. In many cases however you will be pushing the shadows in the foreground a bit which will introduce noise and require some reduction.
Note that noise reduction will remove faint stars. A really amazing star photograph is made by the density of stars in the sky, so care needs to be taken.
Dygiphy provide website development, commercial photography and portraiture services for Melbourne’s small businesses and families. If you found this article helpful, please share or like this page and keep us in mind for your future projects.